Shed Roof Felt Corners

Shed Roof Felt Screwfix Diy Sanglam Shed Roof Felt Shed Shed Roof

Pin By Renee Olague On Sheds Diy Shed Diy Shed Plans Building A Shed

Corner Shed Pent Roof Google Search Terraceroofinginspiration Backyard Sheds Corner Sheds Shiplap Cladding

Corner Summerhouse 8x8 Felt Shingle Roof Free Delivery Ebay Summer House Garden Corner Summer House Outdoor Garden Sheds

Framing A Modified Pyramid Roof Without Trusses General Discussion Contractor Talk Backyard Buildings Backyard Sheds Corner Summer House

Diy Corner Shed Corner Sheds Diy Shed Backyard Sheds
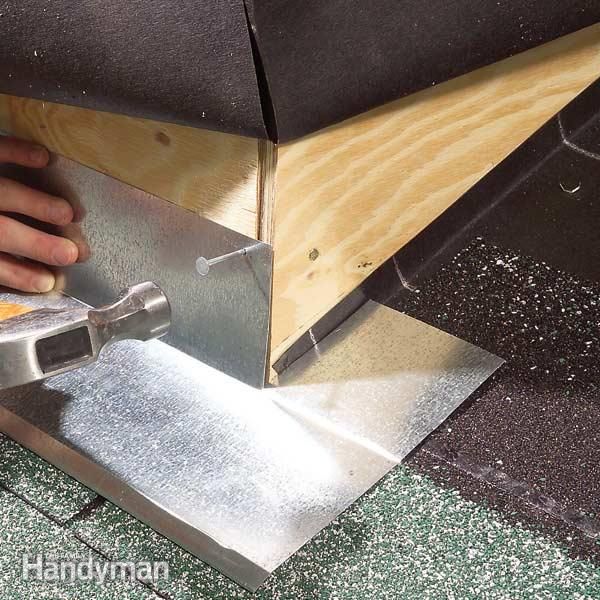
As you roll it out make sure that it remains flat.
Shed roof felt corners.

Markku Corner Log Cabin 5 75 X 3m Corner Log Cabins Building A Shed Log Cabin

Corner Shed Roof Shed Triangle 1 Jpg Gable Roof Design Fibreglass Roof Roof Design

Corner Shed Pent Roof Google Search House She Home Garden Ideas For Your Home Corner Summer House Corner Sheds Building A Shed

Hartwood 7 X 7 Overlap Pressure Treated Corner Shed In 2020 Corner Sheds Building A Shed Shed

5 Sided Corner Shed Roof Framing Plans Corner Sheds Shed Plans Roof Framing

Diy Corner Shed Corner Sheds Backyard Sheds Backyard Shed

Pin On Building Maintenance

Overlap Pressure Treated 8x8 Corner Shed 8x8 Corner Overlap Pressure Shed Treated In 2020 Corner Sheds Wooden Sheds Building A Shed

12 Elegant Corner Shed Plans Shed Plans Shed

T Style Drip Edge Corner Install Jpg 800 X 600 100 Drip Edge Roof Drip Edge Roof Installation

Corner Summer House Corner Summer House Summer House Timber Deck

Found It At Wayfair Co Uk 7 X 7 Wooden Corner Shed Corner Sheds Wooden Sheds

Emma Corner Log Cabin 3m X 3m In 2020 Corner Log Cabins Cabin Double Doors

Wooden Corner Summerhouse 9x9 Garden Room Sunroom Outdoor T G Flat Roof 9ft 9ft 5017730357941 Ebay Garden Rooms Outdoo In 2020 Summer House Garden Room Double Doors
Pin On Remodels And Renovating

Pin On For The Home

Waltons 7 X 7 Pressure Treated Shiplap Double Door Pent Wooden Corner Shed Corner Sheds Wooden Garden Storage Wooden Sheds

Hassan 6 5 X 5 Ft Shiplap Summer House Shed Shiplap Cladding Corner Summer House
Https Encrypted Tbn0 Gstatic Com Images Q Tbn 3aand9gcreyyi4q2lram Jnauvipbivj Idxdnr1i5idk J7mn709dhuud Usqp Cau

A Little Lean To Is The Perfect Storage Solution For That Small Corner Of Your Backyard Small Enough To Keep Backyard Storage Sheds Backyard Storage Tuff Shed

Tiger Sheds 6 5 X 5 Ft Shiplap Summer House Shed Corner Summer House Roof Styles

8 X 8 Forest Premium Tongue And Groove Pressure Treated Wooden Corner Shed 3 46 X 2 8m In 2020 Corner Sheds Shed Building A Shed

A Comprehensive Overview On Home Decoration In 2020 Corner Summer House Summer House Home Essence

Traditional Woodworking Tools Uk 10x10 Corner Shed Plans Backyard Sheds Diy Shed Plans Wood Shed Plans
Source : pinterest.com
